QuickStart#
In this quickstart we’ll build a fully functional voice bot with a browser interface that allows you to have a two-way conversation with a Google LLM model.
The server uses FastAPI to serve a web page with start and stop audio buttons.
Installation#
VoiceStream is distributed on PyPI. To install, run:
pip install voice-stream
This will install the bare minimum requirements of VoiceStream. A lot of the value of VoiceStream comes when integrating it with different audio sources, speech recognition and text to speech systems. By default, the dependencies needed to do that are NOT installed. You will need to install the dependencies for specific integrations separately.
To use integrations, you can install the packages directly, or use the ‘extras’ syntax to install them as part of voice-stream. Run the command below to install the ‘quickstart’ extra dependencies. This will install FastAPI and the Google Cloud Python clients.
pip install voice-stream[quickstart]
Most other integrations can be installed in the same way, by replacing ‘quickstart’ with the name of the integration.
pip install voice-stream[twilio,openai]
FastAPI Server#
Here is the code for our server. You can also find it in the examples directory of the VoiceStream repo.
import os

from fastapi import FastAPI, WebSocket
from fastapi.responses import HTMLResponse
from google.api_core.client_options import ClientOptions
from google.cloud.speech_v1 import SpeechAsyncClient
from google.cloud.texttospeech_v1 import TextToSpeechAsyncClient
from langchain_community.chat_models import ChatVertexAI
from langchain_core.output_parsers import StrOutputParser
from langchain_core.prompts import ChatPromptTemplate

# 0 - VoiceStream imports
from voice_stream import map_step, log_step, recover_exception_step
from voice_stream.audio import AudioFormat
from voice_stream.integrations.fastapi import (
    fastapi_websocket_bytes_source,
    fastapi_websocket_bytes_sink,
)
from voice_stream.integrations.google import (
    google_speech_v1_step,
    google_text_to_speech_step,
)
from voice_stream.integrations.langchain import langchain_load_memory_step

# 1 - HTML shown by the browser
html = """
<!DOCTYPE html>
<html>
    <head><title>VoiceStream Quickstart</title></head>
    <body>
        <script
        src="https://cdn.jsdelivr.net/gh/DaveDeCaprio/voice-stream@main/examples/static/audio_ws.js">
        </script>
        <button onclick="startAudio('audio-player', '/ws/audio')">Start Voice Chat</button>
        <button onclick="stopAudio()">Stop Voice Chat</button>
        <audio id="audio-player"></audio>
    </body>
</html>
"""

# 2 - FastAPI app and route to serve the UI
app = FastAPI()


@app.get("/")
def get():
    return HTMLResponse(html)


# 3 - Set up Google client and credentials
os.environ["GOOGLE_APPLICATION_CREDENTIALS"] = "google_creds.json"
speech_async_client = SpeechAsyncClient(
    client_options=ClientOptions(api_endpoint="us-speech.googleapis.com")
)
text_to_speech_async_client = TextToSpeechAsyncClient()
chain = (
    ChatPromptTemplate.from_messages([("human", "{query}")])
    | ChatVertexAI()
    | StrOutputParser()
)


# 4 - The VoiceStream data flow to run the voice chat
@app.websocket("/ws/audio")
async def audio_websocket_endpoint(websocket: WebSocket):
    stream = fastapi_websocket_bytes_source(websocket)
    stream = google_speech_v1_step(
        stream,
        speech_async_client,
        audio_format=AudioFormat.WEBM_OPUS,
    )
    stream = log_step(stream, "Recognized speech")
    stream = map_step(stream, lambda x: {"query": x})
    stream = langchain_load_memory_step(stream, chain, on_completion="")
    stream = recover_exception_step(
        stream,
        Exception,
        lambda x: "Google blocked the response.  Ending conversation.",
    )
    stream = google_text_to_speech_step(
        stream, text_to_speech_async_client, audio_format=AudioFormat.MP3
    )
    stream = map_step(stream, lambda x: x.audio)
    await fastapi_websocket_bytes_sink(stream, websocket)
Save this code as quickstart.py. We’ll walk through it, but for now you can run it using Uvicorn, which is
a standard way to run FastAPI servers. Uvicorn will already be
installed if you installed with pip install voice-stream[quickstart] above.
uvicorn quickstart:app
You should see the following exception:
google.auth.exceptions.DefaultCredentialsError: File google_creds.json was not found.
If you got that error, then you’ve got everything set up so far. It’s failing because we haven’t configured your Google Cloud setup yet. We will do that in the next section.
 Google Cloud Setup#
In this QuickStart, we will use Google Cloud for the LLM, Speech Recognition, and Text-To-Speech. There are two steps to that. First, we need to set up credentials to call the APIs, and then we need to explicitly enable the APIs we want to use.
Prerequisites#
You’ll need to set up a Google Cloud account and create a project. You can do this for free and get free credits that will cover many hours of VoiceBot conversation.
If you don’t already have an account, follow the instructions at Getting Started with Google Cloud
Credentials#
In order to call Google Cloud APIs you need a set of credentials that identifies your project. We’ll create those now. For this quickstart we will create a service account to access the APIs and then create and download a set of credentials for that account.
Service Account Step by Step
Navigate to https://console.cloud.google.com/apis/credentials
Click on
+ CREATE CREDENTIALSand selectServie Account.Fill in any value for Service account name and press
CREATE AND CONTINUE.Under Select a role, select Basic > Owner and press
CONTINUE.Press
DONE.You should see your new service account listed. Click on it to go to the details.
Go to the KEYS tab, then click on
+ ADD KEYand selectCreate new key.Ensure the key type is JSON and click
CREATE. This will download a JSON file with your credentials.Save the JSON file as
google_creds.jsonin the same directory as this quickstart.
Now if you try to run the quickstart again.
uvicorn quickstart:app
You should get another big exception. If you scroll up, it should contain a message like this:
    status = StatusCode.PERMISSION_DENIED
    details = "Vertex AI API has not been used in project XXXXXXXXX before or it is disabled. Enable it by visiting https://console.developers.google.com/apis/api/aiplatform.googleapis.com/overview then retry. If you enabled this API recently, wait a few minutes for the action to propagate to our systems and retry."
This is because even though you have valid credentials, the individual APIs all need to be turned on for the project. Let’s fix that.
Enable APIs#
In Google Cloud, individual APIs have to be specifically enabled for each project. For this quickstart, go to the 3 links below, and click “Enable”.
Vertex AI - Enables the LLMs
Cloud Speech-to-Text API - Enables speech recognition
Cloud Text-to-Speech API - Enables text-to-speech
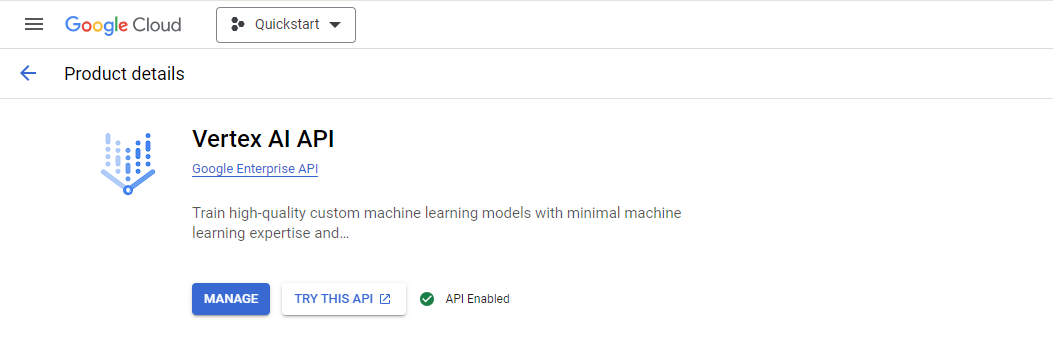
Check the dropdown at the top of the window to make sure you are in the correct project. The screenshot below shows the “quickstart” project.
Run the Quickstart#
Once your Google Cloud setup is configured, the quickstart should run successfully. Try running it again, turning on auto-reloading this time.
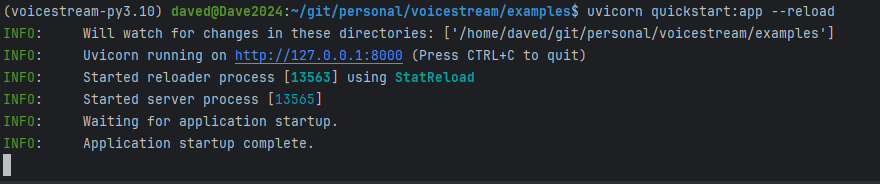
uvicorn quickstart:app --reload
You should see the server start up, with something like the following output:
Now, point your browser to < http://127.0.0.1:8000>. You should see a simple page like this:

Press “Start Voice Chat” and begin talking! The LLM will talk back and converse with you as long as you’d like.
Next Steps#
From here, explore the rest of the documentation to learn more about VoiceStream.
Quickstart Walkthough - A full walkthrough of the code in this quickstart.
Concepts - A methodical intro to the concepts underlying VoiceStream.
Cookbook - How to take advantage of the various capability of VoiceStream.
GitHub Examples - To view and run the code for fully worked examples.
API Reference - If you are into reading API docs directly.